UrBackup Server – free backup solution for SMB
Archsolution Professional Service Team (2019-11-4)
Backup is one of the most important method to protect your digital asset. However, most of the backup solutions are very expensive and we would like to share one of the freeware options – UrBackup.
In this article, we will focus on the Windows installation only due to the ability to backup Windows client workstation – operating system image. For download, you can go to the urbackup.org to download different versions.
Installation of UrBackup Software on Windows
- Download the NSIS (.exe) or MSI installer. You can only use the MSI installer, if you have a 64-bit operating system and at least Windows Vista/2008.
Install the UrBackup Server.
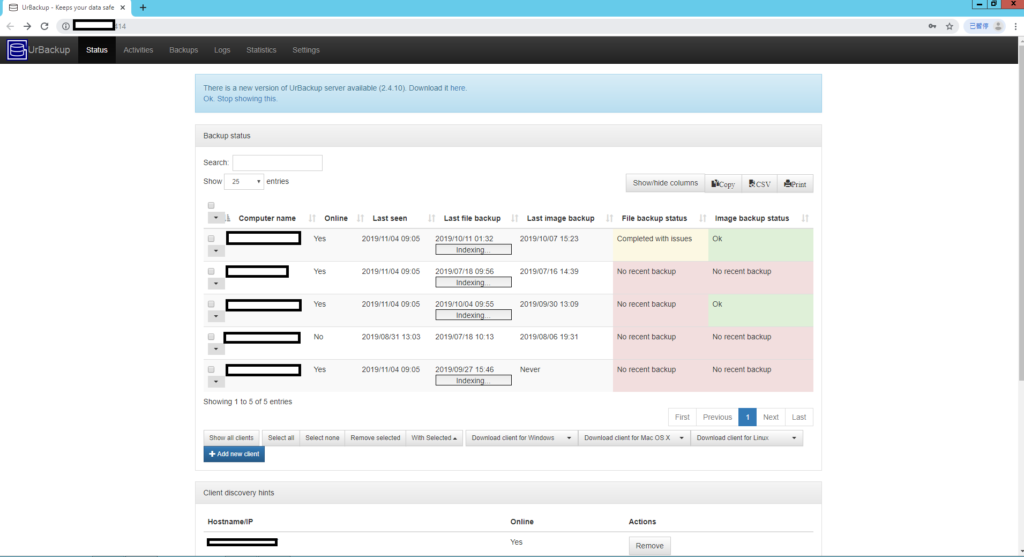
- Go to the web interface ( http://localhost:55414 ) and then go to the settings and configure the folder where UrBackup should store the backup. This folder should have following properties:
-
- It should be on a NTFS formatted volume (not ReFS or FAT).
- There should be enough free space to accommodate the backups
- Preferably the volume should be dedicated to UrBackup backups
- The volume should be persistently online while the UrBackup Server instance is running. UrBackup does not support different backup volumes/drives
- While migration is possible it will be lengthy and difficult. So best plan ahead.
- You can easily increase the size of the backup storage volume, if you use Windows dynamic volumes or a hardware raid. If you are using a plain volume change it to a dynamic volume before the first backup.
- Turn on compression for the urbackup folder (in Explorer: Right click and properties). If you are not using a really old computer it should pay off without decreasing the backup speed. Possible exception: If you plan to backup files with more than 50GB or turn off the image compression and plan to backup volumes with more than 50GB you should not turn on compression. NTFS cannot compress files larger than about 50GB.
- Alternative to the compression you can use the offline dedup and compression build into Windows Server 2012
- Disable 8.3 name generation on the volume. See https://support.microsoft.com/en-us/kb/121007 on how to do this. 8.3 name generation causes errors in rare cases, lowers performance and the 8.3 names are only used in rare cases.
- If you are using Windows Server 2008(R2) (or the equivalent Desktop versions) you should consider consider applying hotfix https://support.microsoft.com/en-us/kb/967351 and then formatting the backup storage volume with
- Format <Drive:> /FS:NTFS /L
-
After you have installed the UrBackup server you should perform following steps:
- Go to the user settings and add an admin account. If you do not do this everybody who can access the server will be able to see all backups!
- Setup the mail server by entering the appropriate mail server settings.
- If you want the clients to be able to backup via Internet and not only via local network, configure the public server name or IP of the server in the Internet settings.
- If you want the clients to be able to access their backups via browser and “right click -> Restore/access backups“‘ enter a server URL. E.g. http://backups.company.com:55414/. Make sure your DNS is configured such that backups.company.com points to the internal IP of the backup server if accessed from the internal network and points to the external IP otherwise. You should put a real web server in front of UrBackup and setup SSL.
- If you want to get logs of failed backups go the “Logs” screen and configure the reports for you email address.
- Change any other setting according to your usage scenario.
Client installation (Windows/Mac OS X client installation)
If you plan on using the client in the same local network as the server, or the client is in your local network during setup time:
- Download the client from http://www.urbackup.org.
- Run the installer.
- Leave the backuped items at the default, manually select paths to backup or configure the client from the server.
- The server will automatically find the client and start backups.
If the client is only reachable via Internet/through NAT:
- Add a new Internet client on the status page.
- Download the client installer for the Internet client and send it to the new client. Alternatively, create a user for the new client (in the settings) and send the user the username/password. The user can then download the client installer from the server on the status page and install it.
- Select the backup paths you want to backup on the client or configure appropriate default directories to backup on the server.
- The server will automatically start backups once the client is connected.
This is the easiest method to add new internet clients.
Notes:
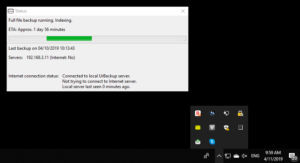
There are 3 different colours of the “Urbackup” client icon.
- Red – not connected
- Yellow – backup running
- Green – backup complete recently
Automatic rollout to multiple Windows computers
First, if you want to deviate from the default backup path selection, configure the general default backup paths so that the correct folders get backed for each client. Then install the clients using one of the following methods.
On local network:
Add the MSI client installer as group policy to the domain controller. Alternatively you can use the NSIS (.exe) installer with the switch “/S” to do a silent install and use something like “psexec”. The server will automatically find and backup the new clients.
For internet clients:
Adapt the script at https://urbackup.atlassian.net/wiki/display/US/Download+custom+client+installer+via+Python to your server URL and create a python executable from the modified script via cx_Freeze (http://cx-freeze.sourceforge.net/). Executing the python executable on the client automatically creates a new internet client on the server, downloads a custom client and runs the installer. You could also add the silent install switch (“/S”) when starting the downloaded installer such that it needs no user intervention.
Client installation on Linux
If you plan on using the client in the same local network as the server, or the client is in your local network during setup time:
- Download the portable binary Linux client from http://www.urbackup.org.
- Run the installer.
- Select one of the available snapshot mechanisms. If none is available consider installing your Linux on LVM or btrfs. Otherwise you will have to stop all applications during backups which are modifying files via pre/post-backup scripts.
- The server will automatically find the client and start backups.
If the client is only reachable via Internet/through NAT:
- Add a new Internet client on the status page.
- Download the client installer for the Internet client and send it to the new client. Alternatively, create a user for the new client (in the settings) and send the user the username/password. The user can then download the client installer from the server on the status page and install it.
- Select the backup paths you want to backup on the client via command line (“urbackupclientctl add-backupdir –path /” or configure appropriate default directories to backup on the server.
- The server will automatically start backups once the client is connected.